The throat chakra continues…
We’re back on the throat chakra! Welcome back if you joined me previously but if you didn’t THAT’S COOL you can go back to the previous article at any time, focus on being here and now!
Last week, I looked at some ‘off the mat’ ways to bring Vishuddha, the throat chakra, into balance. I hope you’ve had a week of journaling and dancing and singing your hopes and dreams out! This week, I’m looking at an ‘on the mat’ practice, with a little bit of pranayama, yogi breathing technique, AND yoga asanas, also known as yoga poses.
Is your throat chakra out of balance?
One symptom of the throat chakra being out of balance is the compulsion to compare ourselves to others, whether that’s comparing how fast we’re going in traffic, how fat or thin or strong or weak we look or feel, and maybe how we compare when we are in yoga class at the studio.
Are you comparing yourself to others?
Stop it! Your life is your journey and no one else’s! You don’t have to compare yourself on the mat – it does matter if you are the person with all the props or the person with none, the one resting in Child’s pose or the one in a backbending chin stand – your practice is for YOU. Let it serve you, let it change without the tide. Different practice for different days as dictated by your body, the weather, your cycle, whatever. Make it all about YOU.
One GREAT thing about taking our yoga practice home, whether by choice or because they’ve all been closed due to corona, is that the instant comparison is taken away. You can’t just glance for the hundredth time at the mat next to you to see how the ‘top of the class’ yogi is getting on. Your practice is then all about you. Sure, it can be helpful sometimes to take a photo or video clip to see how you’re getting on, especially if you’re working on a challenging pose such as headstand or Pincha Mayurasana (forearm balance), but DO NOT let it consume you! It is not how you look, it is how you FEEL.
For yoga asanas, I give variations starting from A increasing in intensity. If you feel cool and unchallenged in the first variation, move on up to the next one. You can ALWAYS wind it back if it’s too much.
Bhramari humming bee breath. Create sounds from the top of the throat that vibrate throughout the entire body.
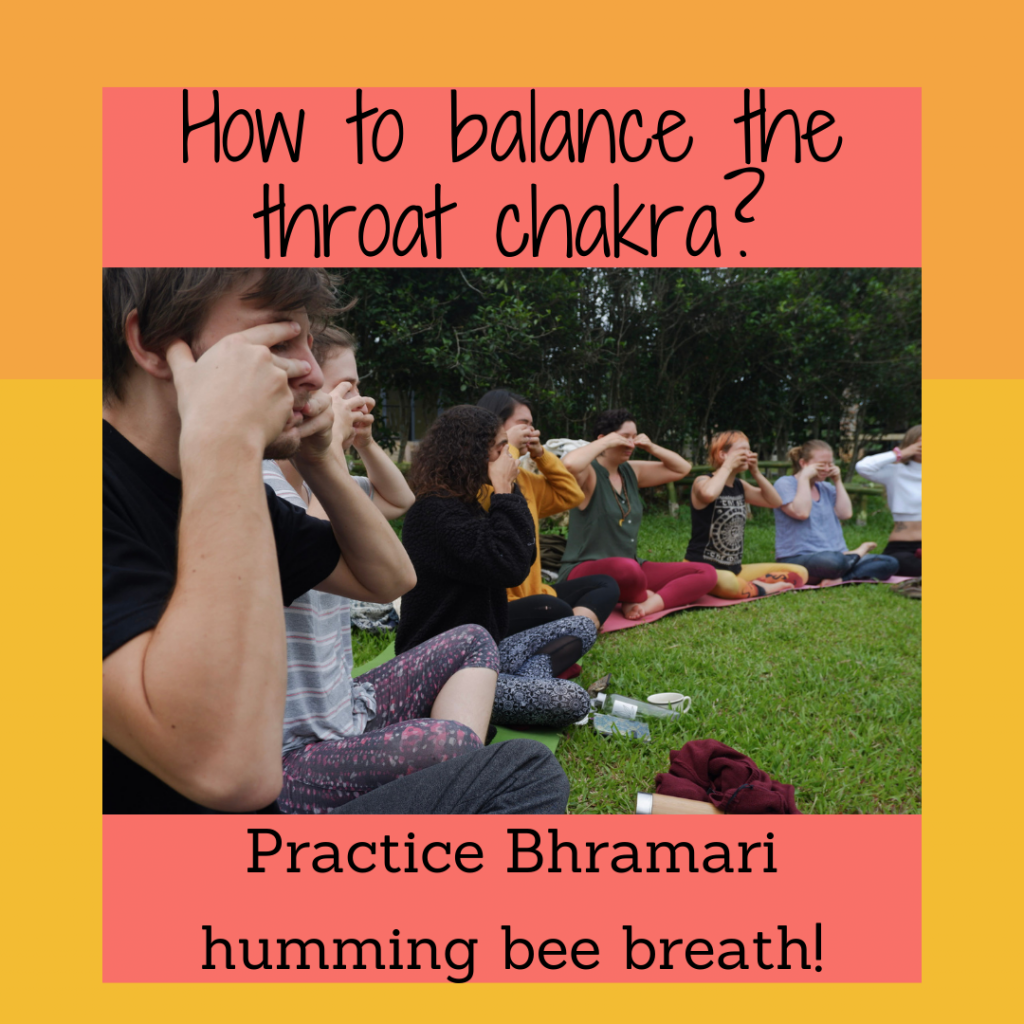
For a full step-by-step guide to this breathing technique, click HERE.
Benefits of humming bee breath:
Calm the nervous system
Prevent throat ailments – what teacher doesn’t suffer from this??!!
Create vibrations that calm and focus the mind
Clear the mind and create balance between inside the mind and outside
Reduce symptoms of anxiety or STRESS
Heighten awareness both inside and outside the body
Purvottanasana – Reverse table top pose. Open the chest and relax the neck.
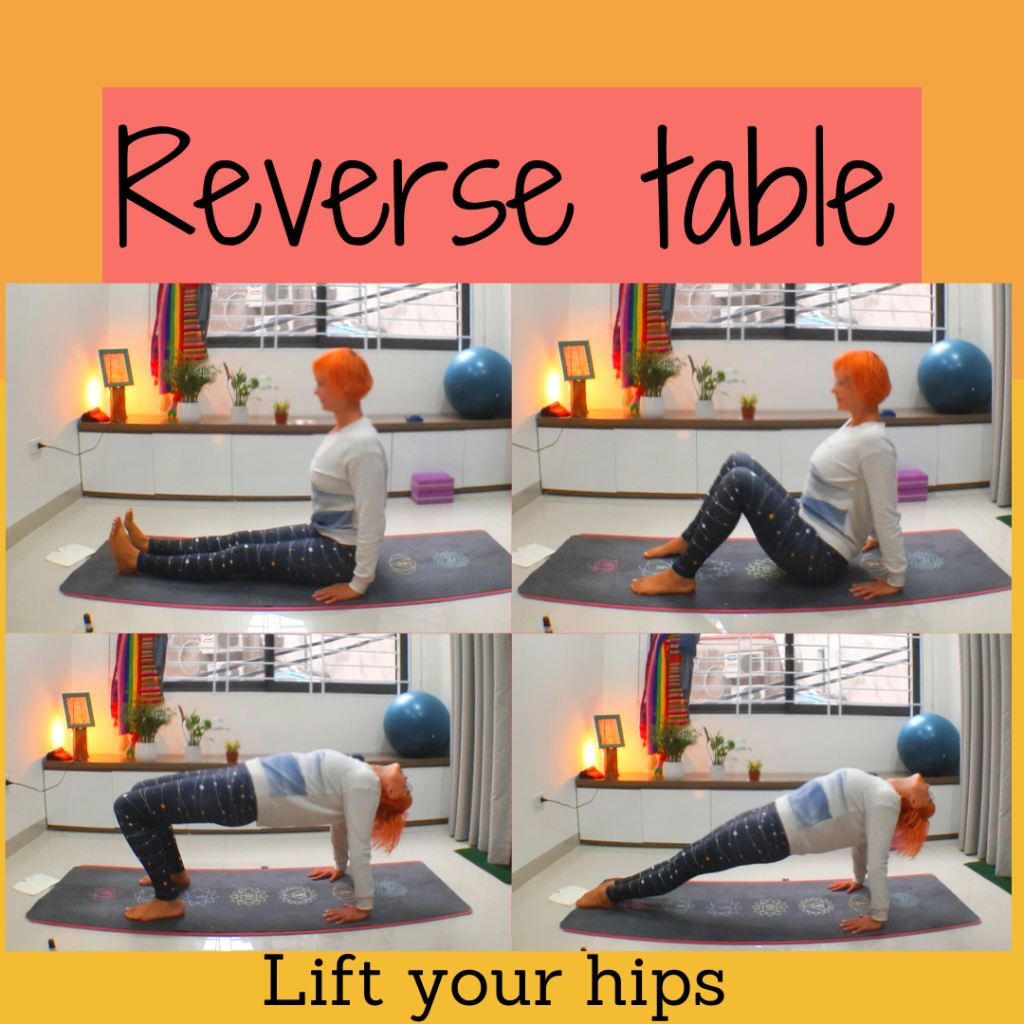
Start seated in Dandasana (seated with legs straight in front of you and hands beside the hips). Bring your hands behind, fingers pointing to your trunk.
A – Bend your knees and bring them closer to your body, hip-width apart. Lift the hips and either tuck the chin to the chest OR let the head fall back if this is comfortable on the neck. Try to stack the ankles under the knees and the hands under the shoulders (straight arms) so you make a rectangle or table shape.
B – Extend the legs (feet hip-width apart) and lift up the hips, pressing the soles of the feet into the mat. The hands are in the same position as A (see above).
C – Extend the legs feet together for this last variation! When you lift up the hips, press the feet into the mat and internally rotate the thighs
Use this pose to…
Improve posture!
Strengthen the arms, wrists and legs
It’s actually a backbend! Press your chest up if in variation C! Open up the chest!
Stimulate the respiratory systems
Salamba Sarvangasana – Shoulder stand. Stretch the back of the neck.
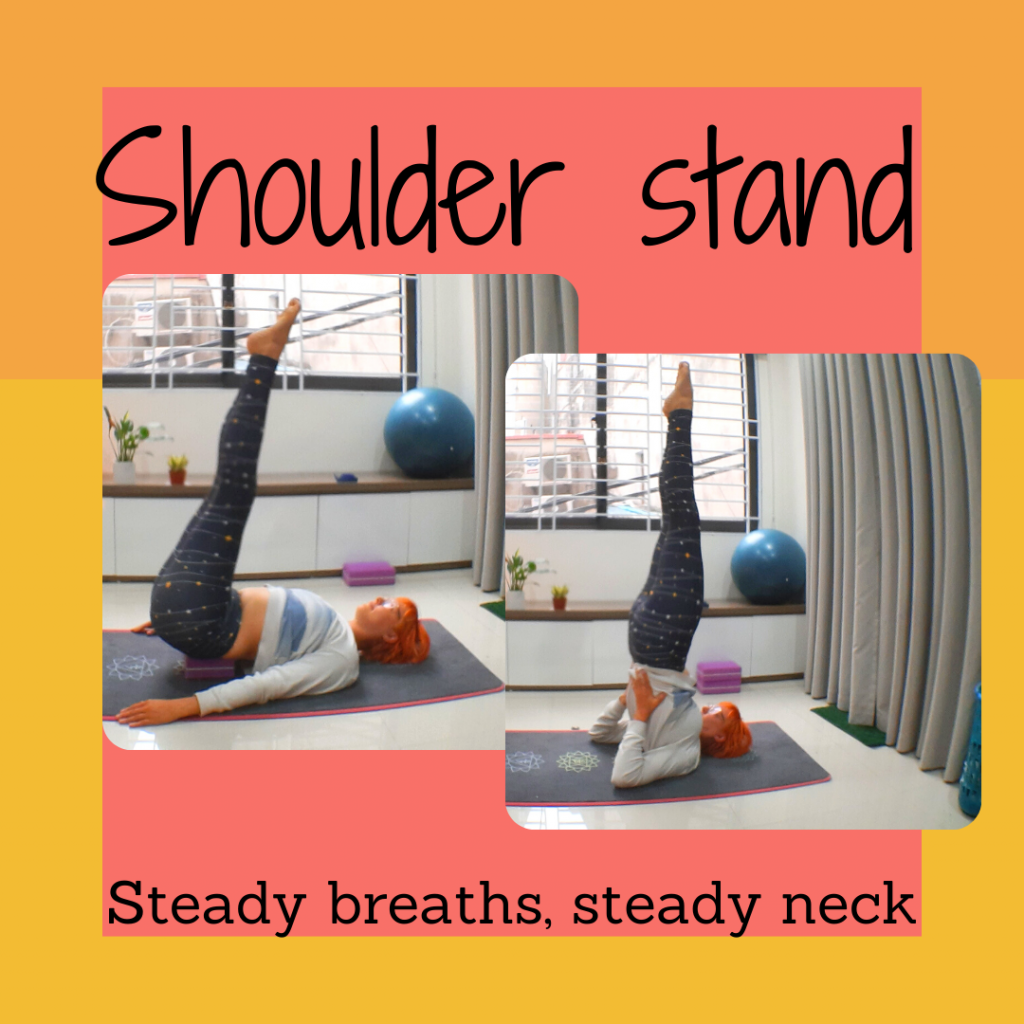
This pose can be a challenge for some folks and may require some props. It should be comfortable and enjoyable – modify it so comfort becomes your reality!
Props you may need are a blanket (neatly folded!!) and/or a block, as well as your mat!
What is a shoulder stand?
It’s an inversion
It’s a stretch to the neck and shoulders
It sends the blood down from your feet to your heart and brain
It can be active OR passive!
Props for shoulder stand
I love shoulder stand and I love that it’s part of the Ashtanga finishing sequence. It’s such a great way to chill down after a practice OR to chill out after a long day at work, whether that’s brought you out and about, on your feet all day or sat beavering away at home. You could even use a wall for extra relaxation points!
If you feel discomfort in your neck, please use a blanket! It will give you that extra little bit of room that hopefully will make this pose comfortable for you, but if it doesn’t please stop and contact me or another yoga teacher for further modifications! Lay you blanket on your mat so that your head is just off it, lining up the edge of the blanket with your shoulders. Use as many blankets as you like! This is also a good plan if your mat is quite thin – like my travel one! – or you have a sensitive spine – also me!
Shoulder stand variations
A – Get your block ready! Lie down on your back and lift up your hips. Place your block under your sacrum, that’s the 5 fused bones in the lower back, and lift up your legs. Your hands can support your thighs for stability or comfort and stay there for as long as you like. Alternatively, you can rest your legs or feet on a wall, if you have one, free from TVs, photo frames, mirrors and stuff like that. Scoot your bum as close to the wall as you can, straighten the legs and rest them on the wall. Close the eyes and chill.
B – Lie down on your mat and lift up both legs, supporting the lower back with your hands and keeping the elbows in line as far as you can. Point the toes and extend up to the sky, internally rotating the thighs. Try to imagine lifting the sitting bones up and forwards, so that your legs, feet and hips are in one straight line.
Pro tip: Focus LESS on how it LOOKS and MORE on how it FEELS. Try not to move your head and neck so much while in the pose, your neck won’t like it!
How long? In Asthanga, we stay for 8 breaths, but you stay for however many feels right. You could start with 4 and see how it feels, then come down.
Exit! To come down from the pose, plant your palms behind you, arms straight, on the mat and use them as your breaks to slowly lower the back, then the legs, to the mat. Try not to lift the neck, head or shoulders when coming down! Once all the way down, give your spine a moment to decompress and readjust before taking a counter pose like fish! See the next pose for more info there!
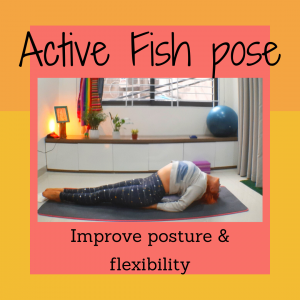
Matsyasana – Fish pose. Release the neck and open the chest (again!)
I love this pose! It has so many benefits from opening the chest to stimulating the thyroid glands! Loads of people around the world suffer from thyroid dysfunction and I am one of them! What does it mean for me? It means I don’t process delicious, delicious bread very well, I put on weight easily and lose it with difficulty, and I get sleeeeeepyyyyyy. But this is one of the many yoga poses that can help with this!
Benefits of fish pose:
Stimulate thyroid
Stretch chest and shoulders
Decompress the neck
Improve posture and spinal flexibility
This pose can be so different if it’s active – the body is engaged – or passive – when the body is relaxed, so let’s look at both!
Active fish pose
Lie on your mat with your legs straight. Bring your right hand, palm down, under your right buttock and left under the left. Press the elbows into the mat and lift your head and chest, looking towards your toes. Then lower the crown of your head to the mat, you can open the elbows a little wider or bring a block or cushion underneath if you’re not touching down. With every inhale, feel your chest rising and lifting up to the sky, growing bigger and bigger, more open and more full of love. Stay for five breaths or maybe more, then tuck your chin to your chest and lower down to the mat. Then, stay for a breath, two or three here while the spine readjusts.
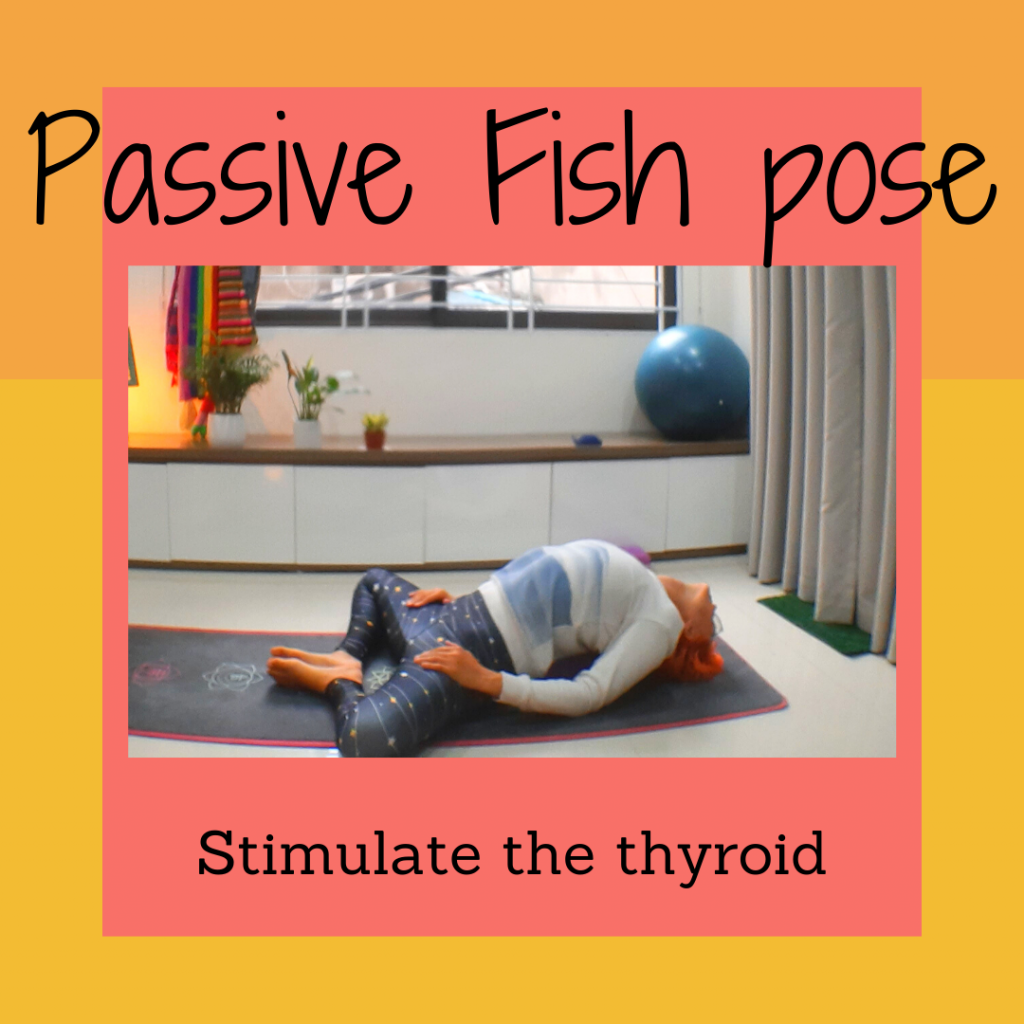
Passive fish pose
You’ll need a block or two (or you can substitute a firm cushion or bolster) for this one! Lie on your back and position the block on its lowest side just below the shoulder blades, the scapula, in the centre of your back. See how that feels. You might want to raise the height onto the taller setting, make sure the length of the block is in line with your spine, and maybe have another block handy to rest your head on.
No blocks? No problem! You can get your pillow and do this! Lay it long ways, parallel to the long side of your mat, trying to elevate the heart and open the throat. Find a way to be comfortable, this should be a super chill and relaxing pose!
How did you get on?
How were these poses for you? How do you feel after completing any of the practices? I’d love to here! Drop a comment below or head over to Facebook, Instagram or the Contact me page to discuss further, if that sounds appealing to you! I’m always here if you want a chat.
Hope to see you again real soon. Get on the email list if you haven’t already, subscribers will have received this full practice in their inbox already and you can still join them! Get on it! I only email once a week so you know that email is jam-packed with awesome information.
And keep your eyes peeled for my upcoming challenge! More on that soon!
May you be happy
May you be peaceful
May you be filled with love
Namaste
xxx
7 comments